A Comprehensive Guide to 2012 Chevy Malibu Hub Bearings: Maintenance, Replacement, and Troubleshooting
Introduction
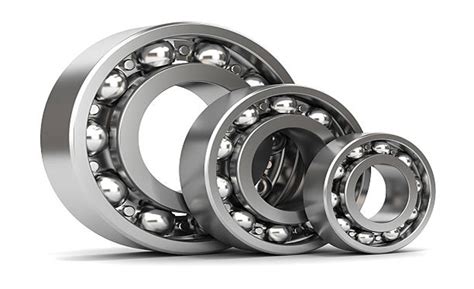
Hub bearings are crucial components in your 2012 Chevy Malibu's wheel assembly, enabling smooth wheel rotation and supporting the vehicle's weight. Understanding their function, maintenance, and potential issues is essential for ensuring your Malibu's safety and performance.
Function of Hub Bearings
Hub bearings serve two primary functions:
-
Load support: They تحمل the weight of the vehicle and distribute it evenly to the wheel.
-
Rotation facilitation: They allow wheels to rotate smoothly by reducing friction between the axle and the wheel.
Maintenance and Inspection
Regular Maintenance
Regular maintenance is crucial for extending the lifespan of hub bearings. However, there are no specific maintenance intervals for hub bearings in the 2012 Chevy Malibu. Instead, it's recommended to have them inspected periodically during routine tire rotations or brake inspections.
Signs of Hub Bearing Issues
Several signs indicate potential hub bearing issues:

-
Grinding or humming noise: A continuous grinding or humming sound coming from the wheels can be a sign of worn or damaged hub bearings.
-
Vibration in the steering wheel: Excessive vibration in the steering wheel while driving may indicate a faulty hub bearing.
-
Uneven tire wear: Premature or uneven tire wear on one or more wheels can be a symptom of hub bearing wear.
-
Loose wheel play: A loose wheel that has excessive play when grabbed at the top and bottom may indicate a worn hub bearing.
Inspection Procedure
To inspect hub bearings, follow these steps:
-
Lift the vehicle: Safely lift your Malibu using a floor jack and jack stands.
-
Remove the wheel: Use a lug wrench to loosen the lug nuts and remove the wheel.
-
Check for play: Grasp the top and bottom of the wheel and wiggle it back and forth. Excessive play indicates a worn hub bearing.
-
Listen for noise: Spin the wheel by hand and listen for any grinding or humming noises.
Replacement
When to Replace Hub Bearings
Hub bearings should be replaced when they exhibit any of the following signs:


- Excessive noise or vibration
- Loose wheel play
- Uneven tire wear
- Damaged or worn bearing components
Replacement Procedure
Replacing hub bearings requires specialized tools and knowledge. It's recommended to have the replacement performed by a qualified mechanic. However, if you have the necessary skills and tools, follow these steps:
-
Gather tools: You'll need a socket set, torque wrench, pry bar, and hub puller.
-
Prepare the vehicle: Remove the wheel and brake caliper.
-
Remove the old bearing: Use a hub puller to remove the old hub bearing.
-
Install the new bearing: Press the new hub bearing into place using a suitable tool.
-
Reassemble: Reinstall the brake caliper and wheel.
-
Tighten and torque: Tighten the lug nuts and torque them to the manufacturer's specifications.
Estimated Cost of Replacement
The cost of replacing hub bearings on a 2012 Chevy Malibu can vary depending on factors such as the mechanic's labor rate, the type of hub bearing used, and the availability of parts. Typically, the cost can range from $200 to $600 per wheel.
Troubleshooting
Common Causes of Hub Bearing Issues
-
Wear and tear: Over time, hub bearings can wear out due to normal use and exposure to elements.
-
Impact damage: Hard impacts from potholes or curbs can damage hub bearings.
-
Water intrusion: Water and moisture can penetrate the hub bearing and cause corrosion and damage.
-
Poor lubrication: Inadequate lubrication can lead to increased friction and accelerated bearing wear.
Effective Strategies for Preventing Hub Bearing Issues
-
Regular maintenance: Periodic inspections and tire rotations can help identify and address potential hub bearing issues early on.
-
Avoid excessive impact: Drive cautiously over rough roads and avoid hitting potholes or curbs to minimize stress on hub bearings.
-
Protect from water: Prevent water from entering the hub bearing by using splash guards and avoiding driving through deep puddles.
-
Proper lubrication: Ensure that the hub bearing is adequately lubricated according to the manufacturer's specifications.
Tips and Tricks
-
Choose high-quality hub bearings: Invest in hub bearings from reputable manufacturers to ensure durability and performance.
-
Use the correct tools: The proper tools, such as a hub puller and torque wrench, are essential for a successful hub bearing replacement.
-
Follow torque specifications: Tighten lug nuts and hub bolts to the manufacturer's specified torque to ensure proper wheel alignment and bearing longevity.
-
Inspect regularly: Regularly check hub bearings for any signs of wear or damage to avoid costly repairs.
Humorous Stories and Lessons Learned
Story 1: The Whistling Wheel
One driver experienced a persistent whistling sound coming from one of their tires. They ignored it for weeks, thinking it was a minor inconvenience. However, the whistling gradually worsened, and the wheel began to wobble. Upon inspection, they discovered a severely worn hub bearing that had caused the wheel to become loose and unsafe.
Lesson: Don't ignore strange noises coming from your vehicle. Even minor sounds can indicate a more significant problem that needs attention.
Story 2: The Loose Nut
Another driver noticed a slight vibration in the steering wheel while driving. They assumed it was an alignment issue and took their car to a mechanic. However, the mechanic quickly identified the problem as a loose hub bearing. The driver had improperly tightened the lug nuts during a recent tire rotation, leading to play and vibration.
Lesson: Always torque lug nuts to the manufacturer's specifications to ensure proper wheel alignment and prevent excessive wear or damage to hub bearings.
Story 3: The Pothole Pitfall
A driver hit a deep pothole on the highway, resulting in a loud bang and a noticeable wobble in their car. They continued driving, hoping the problem would resolve itself. However, the wobble worsened, and they eventually had to pull over. They discovered that the impact had damaged the hub bearing, causing the wheel to become loose and unstable.
Lesson: Avoid hitting potholes or curbs whenever possible. Hard impacts can cause significant damage to various components, including hub bearings, and compromise vehicle safety.
Common Mistakes to Avoid
-
Ignoring warning signs: Neglecting unusual noises, vibrations, or loose wheel play can lead to further damage and safety hazards.
-
Using improper tools: Attempting to replace hub bearings without the correct tools can result in damage to the bearings or other vehicle components.
-
Overtightening or undertightening: Improper torque values for lug nuts and hub bolts can lead to worn threads, loose wheels, or bearing damage.
-
Ignoring lubrication: Failing to properly lubricate hub bearings can accelerate their wear and reduce their lifespan.
-
Purchasing low-quality parts: Using cheap or aftermarket hub bearings may compromise performance, reliability, and safety.
Step-by-Step Approach to Hub Bearing Replacement
-
Safety first: Wear gloves, safety glasses, and park the vehicle on a stable surface.
-
Gather tools: Collect necessary tools, including a jack, jack stands, socket set, torque wrench, pry bar, hub puller, and new hub bearing.
-
Lift the vehicle: Safely lift the vehicle using a jack and secure it on jack stands.
-
Remove the wheel: Use a lug wrench to loosen the lug nuts and remove the wheel.
-
Disconnect brake caliper: Unbolt the brake caliper and support it out of the way using a wire or bungee cord.
-
Remove rotor: Slide the brake rotor off the hub.
| Tool |
Description |
Cost |
| Hub Puller |
A specialized tool designed to remove hub bearings. |
$50-$100 |
| Torque Wrench |
Ensures optimal tightening of lug nuts and hub bolts. |
$100-$200 |
| Pry Bar |
A lever used to pry and separate components, such as the brake caliper and rotor. |
$10-$20 |
-
Remove hub bearing: Use a hub puller to carefully remove the old hub bearing.
-
Install new bearing: Clean the hub and apply a thin layer of new bearing grease. Press the new hub bearing into place using a suitable tool.
-
Reinstall rotor and caliper: Slide the brake rotor back onto the hub and reconnect the brake caliper.
-
Install wheel: Place the wheel on the hub and tighten the lug nuts by hand.
-
Lower the vehicle: Slowly lower the vehicle and fully tighten the lug nuts to the specified torque using a torque wrench.
-
Re-inspect: Check the wheel for any play or unusual noises to ensure the hub bearing replacement was successful.
| Average Lifespan |
Failure Rate |
Impact on Vehicle |
| 7-10 years |
2-3% |
Reduced safety, performance, and fuel efficiency |
| 5-8 years |
5-7% |
Premature tire wear, increased noise and vibration |
| 3-5 years |
10-15% |
Severe safety hazards, loss of control, and potential accidents |
Conclusion
Hub bearings play a vital role in
