Comprehensive Guide to Alternator Bearing Replacement: Ensuring Optimal Electrical Output
An alternator bearing, a critical component within an alternator's assembly, plays a pivotal role in converting mechanical energy from the engine's rotation into electrical energy, which powers various electrical systems and charges the vehicle's battery. Its smooth and efficient operation is essential for maintaining proper vehicle function.
When an alternator bearing fails, it can lead to a variety of issues, including:
- Electrical system malfunctions
- Battery drainage
- Reduced engine performance
- Warning lights on the dashboard
Therefore, promptly replacing a faulty alternator bearing is crucial to prevent further problems and ensure the optimal performance of your vehicle.
Common Causes of Alternator Bearing Failure
Alternator bearings typically have a service life of around 50,000 to 100,000 miles. However, several factors can contribute to premature failure, including:
-
Excessive heat: High operating temperatures can degrade the bearing's lubricant, leading to increased friction and wear.
-
Contamination: Dirt, moisture, and other contaminants entering the bearing can cause corrosion and damage to its components.
-
Misalignment or poor installation: Improper installation or misalignment of the alternator can put additional stress on the bearing, resulting in premature failure.
Signs and Symptoms of a Failing Alternator Bearing
Identifying the signs of a failing alternator bearing is essential for prompt diagnosis and repair. Common symptoms include:
-
Squealing or grinding noises coming from the alternator: This is the most common symptom, caused by increased friction between the bearing's components.
-
Dimming or flickering headlights: Reduced alternator output can cause fluctuations in electrical power, affecting the brightness of headlights.
-
Battery warning light on the dashboard: A common indication of an alternator issue, including bearing failure.
-
Electrical system malfunctions: Various electrical systems, such as the radio or power windows, may experience intermittent or complete failure.
DIY vs. Professional Replacement
Alternator bearing replacement can be a complex task, requiring specialized tools and knowledge. While some mechanically inclined individuals may opt to perform the repair themselves, several benefits favour seeking professional assistance:
-
Specialized tools: Trained technicians have access to specialized tools designed for alternator bearing replacement, ensuring proper installation.
-
Comprehensive diagnosis: Professionals can identify the root cause of the bearing failure, such as misalignment or poor installation, and rectify it during the repair.
-
Warranty: Reputable repair shops typically offer warranties on their work, providing peace of mind and additional protection.
Step-by-Step Alternator Bearing Replacement Procedure
1. Safety Precautions
- Disconnect the negative terminal of the battery to prevent electrical shocks.
- Allow the engine to cool down completely to avoid burns.
- Wear appropriate safety gear, including gloves and safety glasses.
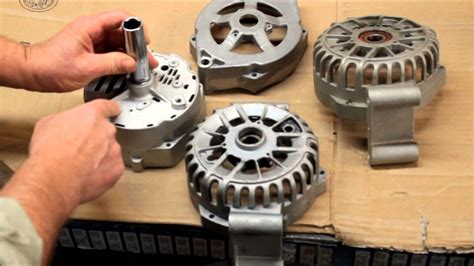
2. Remove the Alternator
- Locate the alternator, typically mounted on the engine block or bracket.
- Disconnect the electrical connectors and the serpentine belt.
- Unbolt and remove the alternator from the engine.
3. Extract the Old Bearing

- Inspect the alternator for any damage or wear.
- Using a specialized bearing puller, carefully extract the old bearing from the alternator housing.
4. Install the New Bearing
- Apply a thin layer of grease to the inner surface of the bearing housing.
- Align the new bearing with the housing and carefully tap it into place using a suitable tool.
5. Reinstall the Alternator
- Position the alternator back onto the engine and secure it with the bolts.
- Reconnect the serpentine belt and electrical connectors.
6. Post-Replacement Checks
- Reconnect the negative battery terminal.
- Start the engine and check for any unusual noises or vibrations.
- Use a multimeter to verify the alternator's output voltage, which should be within the vehicle's specified range.
Troubleshooting Common Mistakes to Avoid
-
Improper bearing selection: Ensure you select a bearing that is the correct size and type for your specific alternator model.
-
Incorrect installation: Follow the manufacturer's instructions meticulously to prevent misalignment or damage to the bearing.
-
Insufficient lubrication: Apply the correct amount of grease to the bearing housing and the bearing itself to ensure smooth operation.
-
Overtightening bolts: Avoid overtightening the alternator mounting bolts, as this can put excessive stress on the bearing.
Pros and Cons of DIY vs. Professional Alternator Bearing Replacement
DIY
Pros:
- Potential cost savings
- Satisfaction of completing the repair yourself
Cons:
- Requires specialized tools and knowledge
- Risk of improper installation
- Limited warranty or liability coverage
Professional

Pros:
- Expert diagnosis and repair
- Access to specialized tools
- Warranty on workperformed
Cons:
- Higher cost compared to DIY
- May require additional diagnostic fees
- Scheduling and availability constraints
Frequently Asked Questions (FAQs)
Q: How often should I replace my alternator bearing?
A: Typically, alternator bearings have a service life of around 50,000 to 100,000 miles. However, factors like driving conditions and maintenance practices can affect their longevity.
Q: Can I replace just the bearing, or do I need to replace the entire alternator?
A: In most cases, replacing just the bearing is sufficient. However, if the alternator itself is damaged or worn, the entire unit may need to be replaced.
Q: How much does it cost to replace an alternator bearing?
A: The cost of alternator bearing replacement varies depending on the vehicle model, bearing type, and whether you choose a DIY or professional repair. Typically, it can range from $150 to $600.
Q: Is it safe to drive with a failing alternator bearing?
A: No, it is not advisable to drive with a failing alternator bearing. It can lead to various electrical system malfunctions and battery drainage, potentially stranding you on the road.
Q: Can I prevent alternator bearing failure?
A: Regular vehicle maintenance, including proper lubrication and periodic inspections, can help prevent alternator bearing failure. Additionally, avoiding excessive heat and contamination can extend their lifespan.
Q: How long does alternator bearing replacement take?
A: The time required for alternator bearing replacement can vary depending on the vehicle model and the experience of the technician. Typically, it can take around 1 to 3 hours for a professional mechanic. For a DIY repair, it may take longer.
