The Ultimate Guide to Clevis Pins: Installation, Maintenance, and Troubleshooting
Introduction
Clevis pins, also called anchor pins or clevis bolts, are essential components used in a wide range of industries and applications. They are designed to connect two or more components together, providing a secure and reliable attachment. This comprehensive guide will delve into the world of clevis pins, covering everything from their types and applications to their proper installation, maintenance, and troubleshooting.
Types and Applications of Clevis Pins
Clevis pins come in various types and sizes, each tailored to specific applications. The three most common types are:
1. Standard Clevis Pins
Standard clevis pins are cylindrical pins with a head on one end and a threaded end on the other. They are widely used in automotive, agricultural, and construction industries.
2. Hitch Pins
Hitch pins are similar to standard clevis pins but have a wider head and a shorter threaded end. They are primarily used for connecting trailers and other towing equipment.
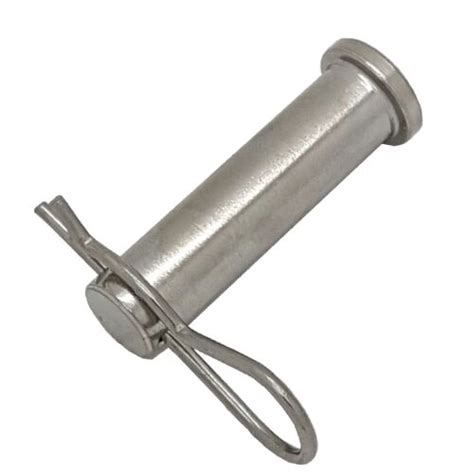
3. Cottered Clevis Pins
Cottered clevis pins have a split end that accommodates a cotter pin or hairpin for added security. They are commonly used in aircraft and other high-stress applications.

Materials and Finishes
Clevis pins are typically made from high-strength materials such as stainless steel, alloy steel, or heat-treated carbon steel. The choice of material depends on the specific application and the required strength, durability, and corrosion resistance.
Additionally, clevis pins come with different surface finishes, including:

-
Plain - No surface treatment
-
Zinc-plated - Provides corrosion resistance
-
Cadmium-plated - Offers high corrosion resistance and lubrication
-
Black oxide coated - Enhances corrosion resistance and wear resistance
Installation Procedure
Installing a clevis pin is a straightforward process, but it's crucial to follow the correct steps to ensure a secure and safe connection.
Step 1: Select the Right Pin
Choose the appropriate clevis pin based on the size and type of application. Refer to the manufacturer's specifications or consult an expert if unsure.
Step 2: Clean and Lubricate
Clean the clevis pin and the отверстие it will be inserted into to remove any dirt or debris. Apply a small amount of lubricant to the threads of the clevis pin.
Step 3: Align the Components
Align the two components that are being connected and ensure they are properly seated. Insert the clevis pin through the отверстие and the clevis.
Step 4: Tighten the Pin
Using a wrench or socket, tighten the threaded end of the clevis pin until it is snug but not overtightened. The amount of torque applied should be within the manufacturer's recommended specifications.
Step 5: Insert the Cotter Pin (if required)
For cottered clevis pins, insert a cotter pin through the split end of the clevis pin. Bend the ends of the cotter pin to secure it.
Maintenance and Inspection
Regular maintenance and inspection of clevis pins are essential to ensure their long-term performance and reliability.
Frequency of Inspection
The frequency of inspection depends on the application and the operating environment. As a general rule, clevis pins in critical applications should be inspected more frequently than those in less demanding applications.
Inspection Points
During inspection, pay close attention to:
-
Wear and tear - Look for visible signs of wear, such as scratches, nicks, or deformation.
-
Corrosion - Inspect for any signs of corrosion, especially on the surface and the threads of the clevis pin.
-
Loose or damaged - Check if the clevis pin is loose or damaged, as this can compromise its integrity.
-
Cotter pin - Ensure the cotter pin is properly seated and secure.
Maintenance Procedures
If any issues are identified during inspection, take prompt action to maintain the clevis pin. This may involve:
- Cleaning and lubrication
- Replacing worn or damaged parts
- Tightening loose connections
- Applying corrosion protection
Troubleshooting Common Clevis Pin Problems
Problem: Loose Clevis Pin
Cause: Insufficient tightening during installation or wear and tear over time.
Solution: Retighten the clevis pin or replace it with a new one if necessary.
Problem: Worn or Bent Clevis Pin
Cause: Excessive force, improper alignment, or corrosion.
Solution: Replace the damaged clevis pin with a new one.
Problem: Failed Cotter Pin
Cause: Inadequate bending of the cotter pin or excessive wear.
Solution: Replace the failed cotter pin with a new one and ensure it is properly secured.
Problem: Corrosion
Cause: Exposure to moisture, chemicals, or extreme temperatures.
Solution: Remove corrosion with a wire brush or sandpaper and apply a corrosion-resistant lubricant.
Problem: Difficulty in Removing Clevis Pin
Cause: Corrosion, dirt, or debris.
Solution: Apply a penetrating lubricant and tap the clevis pin gently with a hammer or mallet.
Tables for Reference
Table 1: Clevis Pin Strength Ratings
| Pin Size (inches) |
Tensile Strength (lbs) |
| 1/4 |
6,000 |
| 5/16 |
10,000 |
| 3/8 |
16,000 |
| 1/2 |
24,000 |
| 5/8 |
32,000 |
Table 2: Clevis Pin Materials and Applications
| Material |
Applications |
| Stainless Steel |
Corrosive environments, high strength |
| Alloy Steel |
High-stress applications, heavy machinery |
| Heat-Treated Carbon Steel |
General-purpose applications, economical |
Table 3: Cotter Pin Sizes and Wire Diameters
| Pin Size (inches) |
Wire Diameter (inches) |
| 1/16 |
0.062 |
| 3/32 |
0.093 |
| 1/8 |
0.125 |
| 5/32 |
0.156 |
| 3/16 |
0.187 |
Frequently Asked Questions (FAQs)
Q1: What is the torque specification for a clevis pin?
A1: Torque specifications vary depending on the size and material of the clevis pin. Refer to the manufacturer's instructions or use a torque wrench to apply the appropriate amount of torque.
Q2: Can I reuse a clevis pin?
A2: Reusing a clevis pin is not recommended, especially in critical applications. Even if it appears to be in good condition, it may have weakened over time and could fail under load.
Q3: How do I prevent clevis pins from seizing?
A3: To prevent seizing, regularly apply a corrosion-resistant lubricant to the threads and moving parts of the clevis pin.
Q4: What types of lubricant are suitable for clevis pins?
A4: Use a lubricant that is compatible with the material of the clevis pin. Commonly used lubricants include lithium grease, molybdenum disulfide grease, or anti-seize compounds.
Q5: How do I safely remove a stubborn clevis pin?
A5: If a clevis pin is stuck or seized, apply a penetrating lubricant and allow it to penetrate the threads. Tap the clevis pin gently with a hammer or mallet and try to remove it. If it still does not come loose, consult a qualified mechanic.
Q6: Can I modify a clevis pin to fit my application?
A6: Modifying a clevis pin is not advisable as it can compromise its strength and integrity. Always use clevis pins that are specifically designed and rated for the intended application.
Call to Action
Clevis pins are essential hardware components that require proper installation, maintenance, and inspection to ensure their performance and reliability. By following the guidance provided in this article, you can effectively manage clevis pins and prevent potential issues. Remember, safety and attention to detail are paramount when dealing with these critical connectors.
