Grease Nipples: The Ultimate Guide to Keeping Your Machinery Running Smoothly
Grease nipples, often referred to as zerk fittings, are essential components for lubricating machinery and equipment. By delivering grease to critical points within the system, they prevent friction, wear, and tear, ensuring optimal performance and extending the lifespan of your machinery.
Understanding Grease Nipples
Types of Grease Nipples
There are various types of grease nipples, each designed for specific applications:
-
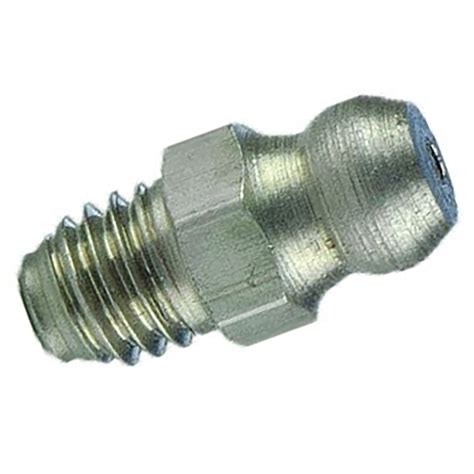
Straight grease nipples: The most common type, used in low-pressure applications with straight lubrication channels.
-
90-degree grease nipples: For situations where access to the lubrication point is limited.
-
45-degree grease nipples: Offer a compromise between straight and 90-degree nipples.
-
Button-head grease nipples: Designed for flush mounting in tight spaces.
-
Hydraulic grease nipples: For high-pressure applications, such as construction equipment.
Materials
Grease nipples are typically made from durable materials like:
-
Steel: Strong and resistant to wear
-
Stainless steel: Corrosion-resistant for harsh environments
-
Brass: Non-magnetic and suitable for use in magnetic fields
-
Aluminum: Lightweight and economical
Proper Grease Application
Effective lubrication is crucial for the longevity of your machinery. Here's a step-by-step guide to applying grease correctly:
-
Clean the grease nipple: Remove any dirt or debris using a clean cloth.
-
Attach the grease gun: Push the grease gun nozzle onto the grease nipple firmly.
-
Apply grease: Pump the grease gun handle until resistance is felt. Avoid over-greasing, as it can damage seals and bearings.
-
Remove the grease gun: Pull the nozzle straight back to avoid cross-threading.
-
Wipe away excess grease: Use a clean cloth to remove any excess grease that may have escaped.
Troubleshooting Grease Nipple Problems
Despite proper lubrication, grease nipples can sometimes experience issues:
Clogged Grease Nipples
-
Cause: Dirt, debris, or old grease accumulation
-
Solution: Remove the grease nipple and clean it using a wire brush or compressed air.
Leaking Grease Nipples
-
Cause: Loose or damaged O-rings or seals, or a worn grease nipple
-
Solution: Replace the O-rings or seals, or install a new grease nipple.
Broken Grease Nipples
-
Cause: Excessive force or improper removal
-
Solution: Remove the broken grease nipple and install a new one using a thread sealant.
Tips and Tricks for Grease Nipple Maintenance
-
Regular lubrication: Follow the recommended lubrication schedule for your machinery.
-
Use high-quality grease: Choose grease specifically formulated for the application.
-
Inspect grease nipples regularly: Check for leaks, clogs, or damage.
-
Replace grease nipples periodically: Over time, grease nipples can wear out and need to be replaced.
-
Consider grease nipples with seals: Seals can prevent dirt and moisture from entering the system.
Common Mistakes to Avoid
-
Over-greasing: Can damage seals and bearings
-
Under-greasing: Can lead to friction and wear
-
Using the wrong grease: Can cause premature failure
-
Ignoring grease nipples: Can result in costly downtime
Pros and Cons of Grease Nipples
Pros
- Extend equipment lifespan
- Reduce friction and wear
- Prevent corrosion
- Easy to use
- Cost-effective
Cons
- Can be messy if not handled properly
- May require frequent lubrication
- Possible to over- or under-grease
- Can become clogged or damaged
Tables for Reference
Table 1: Grease Nipple Types and Applications
| Type |
Applications |
| Straight |
Low-pressure, straight lubrication channels |
| 90-degree |
Limited access to lubrication points |
| 45-degree |
Compromise between straight and 90-degree nipples |
| Button-head |
Flush mounting in tight spaces |
| Hydraulic |
High-pressure applications |
Table 2: Recommended Lubrication Frequency
| Component |
Lubrication Frequency |
| Bearings |
Every 3-6 months |
| Gears |
Every 6-12 months |
| Slides |
Every 1-3 months |
| Chains |
Every 1-2 months |
| Couplings |
Every 6-12 months |
Table 3: Common Grease Nipple Problems and Solutions
| Problem |
Cause |
Solution |
| Clogged |
Dirt, debris, or old grease |
Clean using a wire brush or compressed air |
| Leaking |
Loose or damaged O-rings, seals, or worn grease nipple |
Replace O-rings or seals, or install a new grease nipple |
| Broken |
Excessive force or improper removal |
Remove broken nipple and install a new one using a thread sealant |
Conclusion
Grease nipples are essential components for maintaining the health and longevity of machinery. By providing a means to deliver grease to critical lubrication points, they reduce friction, wear, and corrosion. Proper maintenance and application techniques are crucial for ensuring optimal performance. By understanding the different types of grease nipples, troubleshooting common problems, and following best practices, you can keep your machinery running smoothly for years to come.

