The Ultimate Guide to DIMM Slots: Maximize Memory Performance in Your System
Introduction
DIMM (Dual In-line Memory Module) slots play a crucial role in determining the memory capacity and performance of your computer system. Understanding their function, types, and limitations is essential for building an efficient and high-performing computing environment.
What are DIMM Slots?
DIMM slots are physical connectors on a motherboard where memory modules are installed. These slots provide the electrical interface between the memory and the system's components, allowing data and instructions to be transferred efficiently.
Types of DIMM Slots
Different types of DIMM slots have emerged over time, each designed to support specific memory module types:
-
DDR: DDR (Double Data Rate) slots support DDR memory modules, which operate by transferring data on both the rising and falling edges of the clock signal.
-
DDR2: DDR2 slots support DDR2 memory modules, which offer higher data transfer rates than DDR modules.
-
DDR3: DDR3 slots support DDR3 memory modules, which provide even higher data transfer rates and improved power efficiency.
-
DDR4: DDR4 slots support DDR4 memory modules, which offer significant speed improvements over DDR3 modules and lower power consumption.
-
DDR5: DDR5 slots support DDR5 memory modules, the latest generation of memory technology, offering blazing-fast data transfer rates and improved bandwidth.
Physical Characteristics
DIMM slots vary in size and appearance depending on the type:
-
DDR: Typically 180 pins with a 2.54 mm pitch.
-
DDR2: 240 pins with a 1.27 mm pitch.
-
DDR3: 240 pins with a 0.85 mm pitch.
-
DDR4: 288 pins with a 0.85 mm pitch.
-
DDR5: 288 pins with a 0.85 mm pitch.
Memory Compatibility
DIMM modules are designed to be compatible with specific types of DIMM slots. Installing a DDR memory module into a DDR2 slot, for example, will not work. Always refer to the motherboard's specifications to determine the correct DIMM type for your system.
DIMM Slot Population
The number of DIMM slots available on a motherboard varies depending on the model. A typical consumer-grade motherboard may have 2 or 4 DIMM slots, while server-grade motherboards can have up to 8 or more. Populating all the DIMM slots with matched memory modules allows for dual-channel or quad-channel operation, which can significantly improve memory bandwidth.
Why Multiple DIMM Slots Matter
1. Increased Memory Capacity: Multiple DIMM slots allow you to install more memory modules, increasing the system's overall memory capacity. This is essential for running memory-intensive applications, such as video editing, 3D rendering, and multitasking.

2. Improved Memory Performance: Populating multiple DIMM slots can enable multi-channel memory operation. In dual-channel mode, data is transferred in parallel across two memory channels simultaneously, improving memory bandwidth. Similarly, quad-channel mode uses four channels, further boosting performance.
3. Error Detection and Correction: Many server-grade motherboards support DIMM modules with ECC (Error Checking and Correction) capabilities. ECC memory modules can detect and correct single-bit errors, ensuring data integrity in critical environments.
How to Install DIMM Modules
Installing DIMM modules is a relatively simple process:
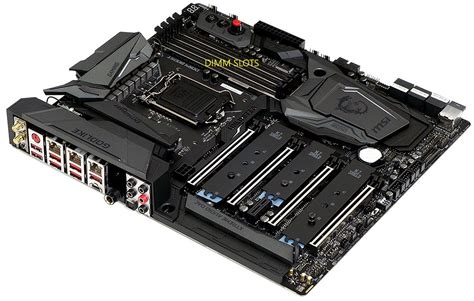
1. Identify the DIMM Slots: Locate the DIMM slots on the motherboard. They are typically grouped in pairs or fours.
2. Open the DIMM Slot Levers: Gently press the levers on both sides of the DIMM slot to unlock it. The levers will open outward.
3. Align the DIMM Module: Take the DIMM module and align it with the DIMM slot. Note the notch on the DIMM module and ensure it aligns with the protrusion in the slot.
4. Insert the DIMM Module: Gently push the DIMM module into the slot until the levers snap back into place. Ensure the module is fully seated and the levers are locked.
5. Repeat for Additional DIMM Modules: Install additional DIMM modules in the same manner.
Tips and Tricks
- Always handle DIMM modules by the edges to avoid touching the contacts.
- Install matched DIMM modules of the same capacity and speed for optimal performance.
- Enable XMP (Extreme Memory Profile) in the BIOS to optimize memory settings for enhanced performance.
- Monitor the memory usage and temperature to ensure the system has sufficient memory and cooling.
Call to Action
Maximizing the performance of your computer system requires an understanding of DIMM slots and their capabilities. By choosing the right DIMM modules and configuring them appropriately, you can unleash the full potential of your system and enhance its overall efficiency.
