The Definitive Guide to Replacing Bearings on a Boat Trailer
Whether you're a seasoned boater or a novice with a newly acquired vessel, replacing bearings on your boat trailer is an essential maintenance task that should not be overlooked. Worn or damaged bearings can lead to serious safety hazards, costly repairs, and unnecessary headaches. This comprehensive guide will provide you with all the knowledge, tools, and step-by-step instructions you need to successfully replace the bearings on your boat trailer.
Importance of Bearings in Boat Trailers
Bearings play a crucial role in the smooth and safe operation of any boat trailer. They allow the wheels to rotate freely, reducing friction and wear on the axle, hub, and tires. Properly functioning bearings ensure:
-
Safe towing: Worn or damaged bearings can cause excessive heat, leading to bearing failure or even tire blowouts, which can be hazardous while towing.
-
Extended trailer life: Bearings that are regularly replaced help prolong the lifespan of your boat trailer by reducing wear and tear on other components.
-
Reduced maintenance costs: Replacing bearings proactively can prevent costly repairs or replacements down the road, saving you money in the long run.
Signs of Worn or Damaged Bearings
The following are common signs that indicate your boat trailer bearings need to be replaced:
-
Excessive heat: Worn or damaged bearings will generate excessive heat when in use, which can be felt by hand on the wheel hubs.
-
Grinding or squealing noises: Metal-on-metal contact due to worn bearings can produce grinding or squealing sounds while towing.
-
Excessive grease leakage: Damaged seals can allow grease to escape, which can be seen as streaks or drips on the wheel hubs or around the trailer's suspension system.
-
Uneven tire wear: Worn bearings can cause the wheels to wobble, resulting in uneven tire wear.
Tools and Materials Required
Before embarking on the bearing replacement process, you will need to gather the following tools and materials:
- Wheel bearing removal tool
- Socket wrench or impact gun
- Adjustable wrench
- Hammer
- Chisel
- New bearings (appropriate for your trailer model)
- New seals
- Bearing grease (marine-grade)
- Clean rags
- Safety glasses
Step-by-Step Guide to Replacing Bearings
1. Safety First:
- Park the trailer on a level surface and engage the parking brake.
- Chock the wheels on the opposite side of the bearings you will be replacing.
- Wear safety glasses throughout the process.
2. Remove the Wheel:
- Remove the lug nuts and washer using a socket wrench or impact gun.
- Gently pull the wheel straight off the axle.
3. Remove the Hub:
- Remove the cotter pin from the castle nut.
- Unscrew the castle nut using an adjustable wrench.
- Pull the hub assembly straight out from the spindle.
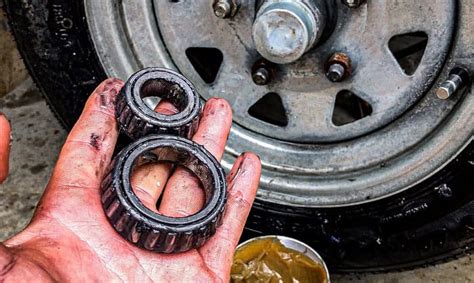
4. Remove the Old Bearings:

- Use a wheel bearing removal tool or chisel and hammer to carefully pry the old bearings off the spindle and hub.
- Clean the spindle and hub thoroughly.
5. Inspect the Spindle and Hub:
- Check for any signs of wear or damage on the spindle and hub. If any are found, consult a mechanic or trailer specialist.
6. Lubricate and Install New Bearings:
- Apply a generous amount of bearing grease to the new bearings.
- Carefully slide the inner bearing onto the spindle.
- Apply more grease and slide the outer bearing onto the hub.
7. Install the Hub:
- Place the hub assembly back onto the spindle and hand-tighten the castle nut.
- Insert the cotter pin through the hole in the castle nut and bend the ends to secure it.
8. Install the Wheel:
- Lift the wheel onto the axle.
- Tighten the lug nuts by hand first, then using a socket wrench or impact gun, tighten them to the manufacturer's specifications.
9. Repeat for the Other Side:
- Repeat steps 1-8 for the other wheel on the same axle.
Effective Strategies for Extending Bearing Life
Apart from regular replacement, the following strategies can help extend the lifespan of your boat trailer bearings:
-
Use marine-grade grease: Marine-grade grease is specially formulated to withstand water, salt, and high temperatures, providing superior protection against corrosion and wear.
-
Submerge the trailer in water: Regularly submerging your trailer in water helps keep the bearings cool and lubricated.
-
Inspect and repack bearings regularly: It is recommended to inspect and repack your bearings every 10,000 miles (or annually for boats that are used in saltwater).
-
Use covers: Protect your bearings from moisture and debris by using covers on your stored boat trailer.
Common Mistakes to Avoid
-
Overtightening the castle nut: Excessive tightening can damage the bearing or spindle.
-
Using the wrong type of grease: Non-marine-grade grease can break down in the presence of water and salt, reducing bearing protection.
-
Improper bearing alignment: Incorrect bearing alignment can lead to premature wear and failure.
-
Skipping bearing replacement: Neglecting bearing replacement can result in catastrophic failure and costly repairs.
Humorous Stories to Learn From
Story 1:
In an attempt to save a few bucks, an inexperienced boater replaced his boat trailer bearings with regular automotive bearings. After launching his boat and towing it for just a few miles, the bearings seized, causing the wheels to lock up and the trailer to violently sway behind his vehicle. He was lucky to avoid a serious accident and learned the hard way about the importance of using marine-grade bearings.
Lesson: Always use the correct type of bearings for your boat trailer.
Story 2:
A forgetful boater neglected to replace his bearings for several seasons. One day, while towing his boat on a long trip, he heard a loud grinding noise coming from the trailer. He discovered that the bearings had disintegrated, causing severe damage to the axle and hub. His costly mistake taught him the value of regular bearing maintenance.
Lesson: Inspect and replace bearings regularly to prevent major problems down the road.
Story 3:
An overly zealous boater overtightened the castle nut during bearing replacement, crushing the bearing and damaging the spindle. His overzealousness resulted in an unnecessary and costly repair.
Lesson: Don't overtighten the castle nut. Follow the manufacturer's torque specifications for proper bearing installation.
Useful Tables
Table 1: Bearing Replacement Frequency
| Trailer Use |
Replacement Interval |
| Light-to-moderate |
Every 2-3 years |
| Moderate-to-heavy |
Annually |
| Saltwater |
Every 6-12 months |
Table 2: Types of Bearing Grease
| Type |
Description |
| Marine-grade |
Specially formulated for water and salt resistance |
| Automotive |
Not suitable for boat trailers |
| Calcium-based |
Contains calcium sulfonate for high-pressure applications |
| Lithium-based |
Common for general-purpose bearing lubrication |
Table 3: Bearing Replacement Costs
| Bearing Type |
Average Cost (per wheel) |
| Single-row bearings |
$20-$50 |
| Double-row bearings |
$30-$70 |
| Hub and bearing assembly |
$100-$250 |
Call to Action
Replacing bearings on a boat trailer is a crucial maintenance task that should not be overlooked. By following the step-by-step instructions provided in this guide and adhering to the effective strategies outlined, you can ensure the smooth and safe operation of your boat trailer for many years to come. If you are not confident in your ability to perform this task, or if you encounter any issues during the process, do not hesitate to consult a qualified mechanic or trailer specialist.
