The Ultimate Guide to Replacing Boat Trailer Bearings: Ensuring Safe and Smooth Towing
Introduction
Boat trailers play a crucial role in transporting your precious boat to and from the water. However, regular maintenance, including replacing worn-out bearings, is essential to ensure a safe and trouble-free towing experience. Whether you're a seasoned boater or a first-time trailer owner, this comprehensive guide will provide you with the necessary knowledge and step-by-step instructions to successfully replace bearings on your boat trailer.
Why Bearing Replacement Matters
Bearings are critical components of a boat trailer's wheel assembly. They allow wheels to rotate smoothly while reducing friction and supporting the weight of the trailer. According to the National Marine Manufacturers Association (NMMA), bearings account for approximately 80% of trailer wheel failures. Worn-out bearings can cause a wide range of problems, including:
- Increased friction and heat buildup
- Premature tire wear
- Wheel wobble or vibration
- Seized axles
- Catastrophic trailer failure
Benefits of Replacing Bearings
Replacing worn-out bearings offers numerous benefits, including:
-
Improved safety: Prevents dangerous wheel failures during towing.
-
Reduced maintenance costs: Replacing bearings proactively can extend the life of other trailer components like tires, hubs, and axles.
-
Smoother towing: Well-lubricated bearings provide a smooth ride, reducing noise and vibration.
-
Increased longevity: Regularly maintained bearings extend the overall lifespan of your boat trailer.
Common Mistakes to Avoid
To ensure successful bearing replacement, avoid these common mistakes:

-
Using improper tools or techniques: Refer to the trailer manufacturer's instructions for specific tools and torque specifications.
-
Overtightening bearings: This can damage bearings and lead to premature failure.
-
Undergreasing bearings: Insufficient lubrication can cause excessive friction and premature wear.
-
Incorrect bearing alignment: Misaligned bearings can lead to uneven wear and shortened lifespan.
-
Ignoring signs of bearing failure: Pay attention to symptoms like grinding noises, excessive heat, or wheel wobble.
Step-by-Step Approach
Materials Needed:
- Replacement bearings (matched to trailer model and hub size)
- Bearing grease
- Bearing packer or grease gun
- Socket wrench with appropriate sockets
- Jack and jack stands
- Lock pliers
- Wire brush or sandpaper
- Clean rags
Instructions:
-
Safety first: Park the trailer on a level surface and engage the parking brake. Chock wheels for added stability.
-
Raise the trailer: Use a jack and jack stands to raise the trailer, allowing the tires to clear the ground.
-
Remove hub cover: Locate the hub cover and remove it using a socket wrench.
-
Remove cotter pin and castle nut: Use pliers to remove the cotter pin securing the castle nut. Unscrew the castle nut using a socket wrench.
-
Pry off hub: Carefully pry the hub off the spindle using a pry bar.
-
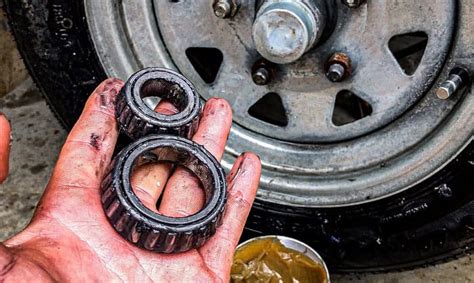
Inspect and discard old bearings: Remove the old bearings and inspect them for wear, rust, or damage. Discard any damaged bearings.
-
Clean hub and spindle: Use a wire brush or sandpaper to remove any rust or debris from the hub and spindle surfaces.
-
Pack new bearings: Apply a generous amount of bearing grease to the new bearings using a bearing packer or grease gun.
-
Install new bearings: Slide the new bearings onto the spindle, ensuring they are properly aligned.
-
Install hub: Place the hub over the bearings and carefully tap it into place using a rubber mallet.
-
Install castle nut: Thread the castle nut onto the spindle and tighten it to the specified torque using a socket wrench.
-
Insert cotter pin: Insert a new cotter pin through the hole in the castle nut and bend the ends to secure it.
-
Install hub cover: Place the hub cover back in place and secure it with the bolts.
-
Repeat process for other side: Repeat steps 2-13 for the other trailer wheel.
-
Lower trailer: Slowly lower the trailer back to the ground, removing the jack stands.
Strategies for Effective Bearing Maintenance
-
Regular inspection: Check bearings for wear, rust, or damage every 2,000-3,000 miles of towing.
-
Proper lubrication: Grease bearings with a high-quality marine-grade bearing grease according to the manufacturer's recommendations.
-
Avoid submerging hub: When launching and retrieving your boat, avoid submerging the wheel hubs in water for prolonged periods.
-
Inspect trailer after towing: Check for any unusual noises, vibrations, or heat buildup after each towing session.
-
Consider bearing buddies: Install bearing buddies on the hubs to automatically lubricate bearings with each towing session.
Humorous Stories and Lessons Learned
-
The Absent-Minded Boater: A boater set out on a long towing trip, but forgot to replace the bearings on his trailer. Halfway through the journey, the bearings seized, locking the wheels and causing the trailer to skid violently. The boater learned the importance of thorough preparation before embarking on a road trip.
-
The Overzealous Greaser: A boat owner applied excessive amounts of grease to his trailer bearings, thinking it would provide extra protection. However, the excess grease attracted dirt and debris, resulting in premature bearing failure. The owner realized the importance of following recommended lubrication guidelines.
-
The Tattle-Tale Hub: A boater noticed a persistent grinding noise coming from his trailer during a towing session. Upon closer inspection, he discovered that the hub had developed a crack. The cracking sound acted as a warning, alerting the boater to a serious issue before it could cause a catastrophic failure.
Informative Tables
Table 1: Recommended Bearing Replacement Intervals
| Trailer Use |
Replacement Interval |
| Occasional Towing |
Every 2,000-3,000 miles |
| Frequent Towing |
Every 1,000-1,500 miles |
| Heavy Towing |
Every 500-1,000 miles |
Table 2: Bearing Nomenclature

| Term |
Description |
| Inner Bearing |
Supports the spindle inside the hub |
| Outer Bearing |
Supports the hub outside the spindle |
| Race |
Groove within the hub or on the spindle where the bearing fits |
| Roller |
Cylindrical or tapered element that rolls between the bearing races |
| Retainer |
Keeps the rollers in place |
Table 3: Bearing Failure Symptoms
| Symptom |
Cause |
| Grinding or squealing noises |
Worn or damaged bearings |
| Excessive heat buildup |
Lack of lubrication or damaged bearings |
| Wheel wobble or vibration |
Misaligned bearings or worn spindle |
| Premature tire wear |
Worn bearings causing misalignment |
| Leaking hub |
Loose or damaged bearings causing excessive grease release |
Pros and Cons of Replacing Bearings Professionally
Pros:
-
Professional expertise: Experienced mechanics can diagnose and solve bearing problems accurately.
-
Convenience: Saves time and effort compared to DIY replacement.
-
Peace of mind: Knowing that the job is done right can provide reassurance.
Cons:
-
Cost: Professional bearing replacement can be expensive, especially at dealerships.
-
Availability: May not always be convenient to schedule an appointment at a repair shop.
