The Ultimate Guide to Replacing Bearings on a Boat Trailer
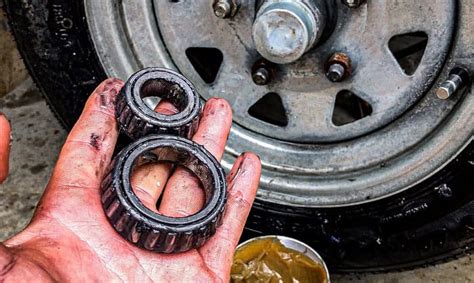
Maintaining a boat trailer is crucial for ensuring safe and smooth journeys with your precious vessel. Among the essential components that require regular attention are the bearings, which play a pivotal role in supporting the weight of the boat and facilitating its movement. If you notice signs of bearing failure, such as excessive heat, grinding noises, or resistance when rotating the wheels, it's imperative to replace them promptly to prevent further damage.
Preparing for the Task
Before embarking on the bearing replacement process, it's essential to gather the necessary tools and materials. You'll need:
- New bearings and seals (sized according to your trailer's hub)
- Socket wrench
- Impact wrench (optional but recommended for stubborn bolts)
- Grease gun and marine-grade grease
- Seal puller
- Hammer
- Safety glasses
- Gloves
Step-by-Step Guide to Replacing Bearings
1. Safety First
- Park the trailer on a level surface and engage the parking brake.
- Support the trailer with jack stands to prevent it from rolling.
- Disconnect the electrical wires connected to the trailer lights.
- Wear safety glasses and gloves to protect yourself.
2. Remove the Tire
- Use a socket wrench to loosen the lug nuts, but do not remove them completely.
- Lift the trailer using a jack and place it on a jack stand.
- Remove the lug nuts and carefully pull off the tire.
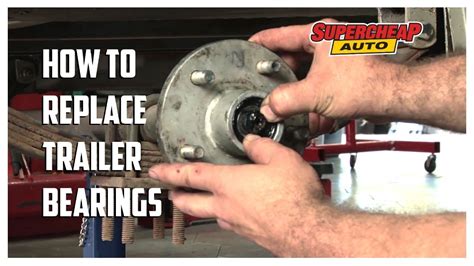
3. Remove the Hub
- Locate the hub nut on the spindle and use an impact wrench or socket wrench to remove it.
- Grip the hub firmly and pull it straight off the spindle.
4. Remove the Old Bearings
- Using a seal puller, carefully remove the old seals from the hub.
- Use a hammer and drift to gently tap out the old bearings from the hub.
5. Inspect the Hub
- Examine the hub for any damage or wear. If the hub is damaged, it may need to be replaced.
- Clean the hub thoroughly with a degreaser to remove any old grease or debris.
6. Install the New Bearings

- Apply a generous amount of marine-grade grease to the new bearings.
- Carefully insert the bearings into the hub, ensuring they are properly seated.
- Use a hammer and drift to gently tap the bearings into place.
7. Install the New Seals
- Apply a thin layer of grease to the new seals.
- Using a seal installer, carefully press the new seals into the hub.
- Ensure the seals are flush with the hub surface.
8. Reinstall the Hub
- Position the hub back onto the spindle and tighten the hub nut using an impact wrench or socket wrench.
- Apply a small amount of grease to the threads of the hub nut to prevent corrosion.
9. Reinstall the Tire
- Place the tire back on the hub and hand-tighten the lug nuts.
- Use an impact wrench or socket wrench to fully tighten the lug nuts.
- Remove the trailer from the jack stands.
10. Final Checks
- Reconnect the electrical wires.
- Rotate the tire by hand to ensure it spins freely.
- Check for any leaks or unusual noises.
- Repack the bearings with grease after the first 50 miles of driving.
Troubleshooting Common Bearing Problems
-
Overheating: Insufficient lubrication, worn bearings, or damaged seals can cause overheating.
-
Grinding noises: Worn or damaged bearings can produce grinding noises.
-
Resistance when rotating: Seized or excessively tight bearings can make it difficult to rotate the wheels.
-
Leaking grease: Damaged or worn seals can allow grease to leak out of the hub.
Tips and Tricks
-
Use high-quality bearings: Invest in quality bearings from reputable manufacturers.
-
Inspect bearings regularly: Check the bearings for wear or damage every 6-12 months.
-
Repack bearings periodically: Repack bearings with marine-grade grease every 1,500-2,000 miles of driving.
-
Follow the manufacturer's instructions: Refer to the trailer manufacturer's recommendations for specific bearing maintenance guidelines.
Stories and Lessons Learned
Story 1:
-
The Importance of Regular Inspection: A boat owner ignored signs of bearing wear, leading to a bearing failure that caused the trailer to lock up during a road trip.
-
Lesson Learned: Regular inspection and maintenance can prevent costly failures.
Story 2:
-
Proper Grease Application: An overzealous boat owner packed the bearings with too much grease, creating excessive heat and leading to premature bearing failure.
-
Lesson Learned: Apply grease according to the manufacturer's instructions to avoid overheating.
Story 3:
-
The Value of a Grease Gun: A boat owner relied on a manual pump to grease his bearings, which resulted in inadequate lubrication and bearing damage.
-
Lesson Learned: Use a grease gun to ensure proper lubrication of the bearings.
Common Mistakes to Avoid
-
Using the wrong bearings: Installing bearings that are not the correct size or type can cause premature failure.
-
Overtightening the hub nut: Excessive tightening can damage the bearings and spindle.
-
Using the wrong grease: Using grease that is not specifically designed for marine applications can lead to bearing corrosion or failure.
-
Ignoring bearing inspection: Failing to inspect bearings regularly can result in missed damage that could lead to costly failures.
-
Skipping bearing repacking: Neglecting to repack the bearings at regular intervals can reduce their lifespan and increase the risk of failure.
Call to Action
Replacing bearings on a boat trailer is a crucial maintenance task that ensures the safety and longevity of your trailer. By following the steps outlined in this guide, you can confidently perform this task and keep your boat and trailer in top condition. Remember to always prioritize safety, inspect bearings regularly, and don't hesitate to seek professional assistance if you encounter any difficulties.

Bearing Size and Type Guide
| Trailer Weight (lbs) |
Bearing Size |
Bearing Type |
| 1,500-2,500 |
1.0625" |
Timken Set 3 |
| 2,500-3,500 |
1.1875" |
Timken Set 4 |
| 3,500-4,500 |
1.3125" |
Timken Set 5 |
| 4,500-5,500 |
1.4375" |
Timken Set 6 |
| 5,500-6,500 |
1.5625" |
Timken Set 7 |
Common Symptoms of Bearing Failure
| Symptom |
Possible Causes |
| Overheating |
Insufficient lubrication, worn bearings, damaged seals |
| Grinding noises |
Worn or damaged bearings |
| Resistance when rotating |
Seized or excessively tight bearings |
| Leaking grease |
Damaged or worn seals |
| Axle vibration |
Impaired bearings |
Estimated Cost of Bearing Replacement
| Component |
Cost Range |
| Bearings |
$20-$50 per set |
| Seals |
$10-$20 per set |
| Labor (if hiring a mechanic) |
$50-$150 per hour |
Note: The cost may vary depending on the trailer size, the extent of damage, and labor rates in your area.
