Taking the Weight: A Comprehensive Guide to Replacing Bearings on Boat Trailers
As boat enthusiasts, we rely heavily on our trailers to safely transport our precious vessels to and from the water. These trailers bear the weight of our boats, making properly maintained bearings essential for smooth and secure towing.
Understanding the Importance of Trailer Bearings
Boat trailer bearings are crucial components that support the axle and allow the wheels to rotate smoothly. They prevent friction, excessive heat buildup, and premature wear of other trailer parts. When bearings deteriorate, it can lead to:
-
Premature failure of tires and rims: Worn bearings cause excessive play in the hub, which puts stress on the tires and can lead to cracking or blowouts.
-
Damage to the axle and spindle: Without proper bearing support, the axle and spindle can wear down, weakening the trailer's structural integrity.
-
Increased towing resistance: Worn bearings create resistance that increases fuel consumption and reduces towing efficiency.
Neglecting trailer bearings can not only compromise the safety of your boat but also result in costly repairs. Therefore, it's imperative to regularly inspect and maintain them.
Step-by-Step Approach to Bearing Replacement
Replacing trailer bearings is a relatively straightforward task that can be accomplished in a few hours with the right tools and a little know-how. Here's a step-by-step guide to help you through the process:
Tools and Materials
- Jack and jack stands
- Lug wrench or impact wrench
- Wheel bearing puller
- Wheel bearing installer
- New bearings, races, and seals
- Grease gun and marine-grade grease
- Gloves, eye protection, and appropriate clothing
Step 1: Safety First
- Park the trailer on a level surface, and engage the parking brake.
- Place jack stands under the frame to support the trailer and relieve pressure on the wheels.
- Remove the lug nuts but do not detach the wheel yet.
Step 2: Remove the Wheel
- Tap lightly on the back of the tire with a hammer to loosen the wheel from the hub.
- Slide the wheel off the axle and set it aside.
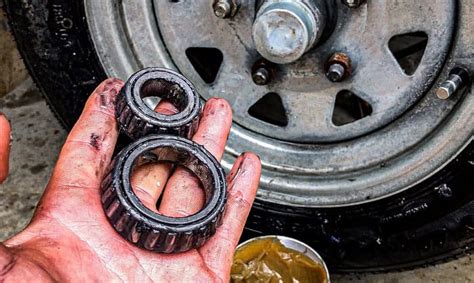
Step 3: Extract the Old Bearings
- Locate the bearing dust cap and carefully pry it off with a screwdriver or bearing puller.
- Remove the cotter pin that secures the castle nut.
- Use a socket wrench to loosen and remove the castle nut.
- Carefully slide off the washer, retaining ring, and old bearings.
Step 4: Inspect the Hub and Axle
- Clean the hub and axle thoroughly using a wire brush to remove any dirt or rust.
- Check for any signs of wear, damage, or rust. If damage is severe, it may be necessary to replace the hub or axle.
Step 5: Install the New Bearings
- Apply a generous amount of marine-grade grease to the new bearing races and bearings.
- Place the new bearings on the spindle and slide them all the way to the shoulder.
- Install the retaining ring and washer over the bearings.
Step 6: Reassemble the Hub
- Slide the hub back onto the spindle and tighten the castle nut.
- Install a new cotter pin to secure the castle nut.
- Replace the dust cap.
Step 7: Repeat for the Other Wheel
- Repeat the process for the other wheel on the same axle.
- Double-check all bolts and nuts are securely tightened.
Step 8: Reinstall the Wheels
- Slide the wheels back onto the axle and hand-tighten the lug nuts.
- Use a torque wrench to tighten the lug nuts to the manufacturer's specifications.
Step 9: Grease and Lubricate
- Apply a liberal amount of marine-grade grease to the grease zerk on the hub.
- Pump grease until it emerges from the seal.
Common Mistakes to Avoid
-
Using the wrong size or type of bearings: Improperly sized bearings can lead to accelerated wear and damage.
-
Installing bearings dry: Always lubricate new bearings with marine-grade grease before installation.
-
Over-tightening or under-tightening the castle nut: Too tight can damage bearings, while too loose can cause them to overheat.
-
Ignoring the dust cap: The dust cap plays a crucial role in preventing contaminants from entering the hub.
Humorous Stories and Lessons Learned
-
The Loose Wheel Adventure: One boater neglected to properly tighten the lug nuts on his trailer. During a road trip, a wheel came loose and rolled down the highway, narrowly missing oncoming traffic. Lesson: Always double-check the tightness of all bolts and nuts.

-
The Burning Hub Saga: Another boater installed new bearings but failed to grease them before assembly. The result was a smoking hub and a trailer that had to be towed home. Lesson: Lubrication is essential for smooth operation and longevity of trailer components.
-
The Stainless Steel Surprise: A well-intentioned boater decided to upgrade his trailer bearings to stainless steel. However, he failed to realize that stainless steel bearings require specific grease. The result was corrosion and premature failure. Lesson: Use the correct type of grease for the specific bearings you install.
Why Replacing Bearings Matters
Regular bearing maintenance not only enhances safety but also provides numerous benefits:

-
Extended trailer life: Well-maintained bearings contribute significantly to the longevity of your trailer by preventing premature wear and damage.
-
Improved towing performance: Properly functioning bearings reduce friction and rolling resistance, resulting in better towing efficiency and reduced fuel consumption.
-
Peace of mind: Knowing that your trailer's bearings are in good condition provides peace of mind while towing your boat.
Call to Action
Maintaining trailer bearings is crucial for the safety and performance of your boat trailer. By following the step-by-step guide and avoiding common mistakes, you can ensure that your trailer operates smoothly and reliably for many years to come. Take the time to regularly inspect and replace bearings as needed, and enjoy the peace of mind that comes with knowing your boat is secure.
Additional Resources:
Table 1: Recommended Bearing Maintenance Schedule
| Trailer Use |
Inspection Interval |
Replacement Interval |
| Moderate use (less than 5,000 miles per year) |
Every 6 months |
Every 2-3 years |
| Heavy use (more than 5,000 miles per year) |
Every 3 months |
Every 1-2 years |
| Saltwater use |
Every 3 months |
Every year |
Table 2: Bearing Types and Grease Requirements
| Bearing Type |
Grease Type |
| Standard tapered roller bearings |
Lithium-based marine-grade grease |
| Stainless steel bearings |
Silicone-based marine-grade grease |
| Ceramic bearings |
Ceramic-specific grease |
Table 3: Bearing Removal and Installation Tools
| Tool |
Description |
| Bearing puller |
Removes old bearings from the spindle |
| Bearing installer |
Installs new bearings onto the spindle |
| Torque wrench |
Tightens the castle nut to the manufacturer's specifications |
