How to Replace Bearings on a Boat Trailer: A Comprehensive Guide
Boat trailers are essential for transporting your precious watercraft, and their bearings play a crucial role in ensuring a smooth and safe ride. However, these bearings can deteriorate over time, leading to potential trailer failure and costly repairs. Replacing bearings on a boat trailer is a crucial maintenance task that every boat owner should know how to perform. This comprehensive guide will walk you through the step-by-step process of replacing bearings on your boat trailer, along with helpful tips and tricks.
Why Replace Bearings?
Boat trailer bearings are subjected to constant stress and wear from water, salt, and road debris. Over time, these factors can cause the bearings to wear down, leading to:
-
Increased friction: Worn bearings create more friction, which can make it harder to tow your boat and reduce fuel efficiency.
-
Premature tire wear: Worn bearings can cause tires to wear unevenly, leading to premature replacement.
-
Trailer failure: In severe cases, worn bearings can cause the trailer to seize up or even break, potentially resulting in serious accidents.
Signs You Need to Replace Bearings
Here are some common signs that indicate it's time to replace the bearings on your boat trailer:
-
Excessive play: Grab the tire and wiggle it back and forth. If there's more than 1/16 inch of play, it's time for new bearings.
-
Loud noises: Worn bearings often make a grinding or squeaking sound when towing.
-
Overheating: If the hub or wheel feels hot to the touch after towing, it could be a sign of worn bearings.
-
Rust or corrosion: Inspect the bearings for signs of rust or corrosion, which can weaken the bearings and reduce their lifespan.
Materials You'll Need
Before you begin, gather the following materials:
- New boat trailer bearings (the correct size for your trailer)
- Bearing grease
- Sealant
- Rags or paper towels
- Socket wrench or impact wrench
- Hammer
- Chisel
Step-by-Step Guide to Replacing Bearings
1. Safety First
- Park the trailer on a level surface and engage the parking brake.
- Chock the wheels opposite the side you're working on.
- Gather all your tools and materials before starting.
2. Remove the Old Bearings
-
Remove the hub: Using a socket wrench or impact wrench, remove the lug nuts and bolts that hold the hub in place. Carefully lift the hub off the spindle.
-
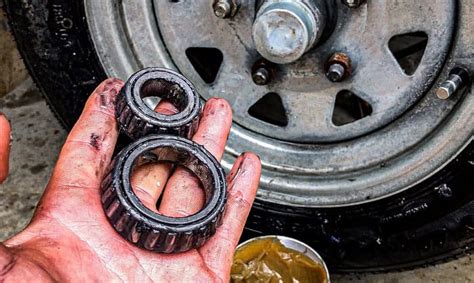
Remove the old bearings: Use a chisel and hammer to carefully pry the old bearings out of the hub. Be careful not to damage the hub or spindle.
-
Clean the hub: Clean the hub and spindle thoroughly to remove any old grease or debris.
3. Install the New Bearings
-
Apply grease: Apply a generous amount of bearing grease to the inside of the hub.
-
Insert the new bearings: Carefully slide the new bearings onto the spindle. Use a hammer to tap them in firmly.
-
Inspect the bearings: Ensure that the bearings are seated correctly and that there's no excessive play.
4. Reinstall the Hub
-
Apply sealant: Apply a thin layer of sealant around the hub's outer edge.
-
Position the hub: Place the hub back onto the spindle and align it correctly.
-
Tighten the lug nuts: Using a socket wrench or impact wrench, tighten the lug nuts and bolts evenly to the manufacturer's specifications.
5. Repack the Bearings
-
Remove the grease cap: Remove the grease cap from the hub.
-
Apply grease: Fill the hub with bearing grease until it's about 2/3 full.
-
Reinstall the grease cap: Clean the grease cap and reinstall it onto the hub.
6. Final Checks
-
Check tire play: Grab the tire and wiggle it back and forth. There should be no more than 1/16 inch of play.
-
Test drive: Take the trailer for a short test drive and listen for any unusual noises or vibrations.
-
Re-lubricate: After the initial test drive, re-lubricate the bearings by adding a few pumps of grease to the grease cap.
Troubleshooting: Common Mistakes to Avoid
-
Using the wrong size bearings: Always use the correct size bearings for your specific trailer model. Incorrect size bearings can cause premature failure and damage your trailer.
-
Overtightening the lug nuts: Overtightening the lug nuts can damage the bearings and make it difficult to remove the hub in the future.
-
Not repacking the bearings regularly: Regular repacking of the bearings is essential to prevent premature wear. Follow the manufacturer's recommended repacking intervals, typically every 1,000-2,000 miles.
-
Ignoring signs of bearing failure: If you notice any signs of bearing failure, such as excessive play, noise, or overheating, replace the bearings immediately. Ignoring these signs can lead to more expensive repairs.
Pros and Cons of Replacing Bearings Yourself
Pros:
-
Cost savings: Replacing bearings yourself can save you a significant amount of money compared to hiring a professional.
-
Convenience: You can perform the task at your own pace and on your own schedule.
-
Satisfaction: There's a sense of accomplishment in successfully completing the task yourself.
Cons:

-
Complexity: Replacing bearings can be a complex task, especially if you're not mechanically inclined.
-
Safety risk: If the bearings are not replaced correctly, it can pose a safety risk while towing your boat.
-
Time consumption: Depending on your skill level, replacing bearings can take several hours.
Tips and Tricks for Success
- Use a high-quality bearing grease that is specifically designed for trailer bearings.
- Clean your tools and work area thoroughly before starting.
- Inspect the spindle for any damage or wear. Replace it if necessary.
- Use a torque wrench to tighten the lug nuts to the manufacturer's specifications.
- After replacing the bearings, tow your boat for a short distance and then re-lubricate them.
- Keep a spare set of bearings in your trailer toolbox for emergencies.
Stories from the Road: Humorous Tales of Bearing Troubles
-
The Squeaky Wheel: One boat owner had a bearing that would make a loud squeaking noise when towing. After replacing the bearing, he realized that the noise was actually coming from a loose bolt on his trailer frame.
-
The Overheated Hub: Another boat owner experienced a seized hub while towing. Upon inspection, he discovered that the bearings had been installed incorrectly and were not properly lubricated.
-
The Broken Spindle: A third boat owner had a trailer spindle break while driving down the highway. The cause was a combination of worn bearings and a damaged spindle. The boat and trailer were both severely damaged.
These stories highlight the importance of timely bearing replacement and proper maintenance of your boat trailer. By following the steps outlined in this guide, you can avoid costly repairs and ensure a safe and smooth ride for your boat.
Comparison of Professional vs. DIY Bearing Replacement
| Factor |
Professional Replacement |
DIY Replacement |
| Cost |
Higher |
Lower |
| Convenience |
Less convenient |
More convenient |
| Expertise |
Guaranteed |
Requires some mechanical skill |
| Time |
Less time-consuming |
More time-consuming |
| Safety |
Lower risk |
Higher risk if not done correctly |
Ultimately, the decision of whether to replace bearings yourself or hire a professional depends on your individual circumstances. If you have the time, skills, and tools, DIY bearing replacement can save you money. However, if you prefer the peace of mind of a professional installation, it may be worth the additional cost.

Frequently Asked Questions
Q: How often should I replace the bearings on my boat trailer?
A: The frequency of bearing replacement depends on your towing habits and the conditions you typically tow in. As a general rule, it's recommended to replace bearings every 1,000-2,000 miles or every year, whichever comes first.
Q: How much does it cost to replace boat trailer bearings?
A: The cost of replacing boat trailer bearings varies depending on the size of your trailer and whether you choose to do it yourself or hire a professional. DIY bearing replacement can cost around $50-$100 for parts, while professional replacement can range from $150-$300.
Q: Can I drive my boat with worn bearings?
A: It is not recommended to drive your boat with worn bearings. Worn bearings can lead to excessive friction, premature tire wear, and even trailer failure. Replacing worn bearings is a critical safety measure.
Q: What causes boat trailer bearings to wear out?
A: Boat trailer bearings wear out due to a combination of factors, including water, salt, road debris, and improper lubrication. Regular repacking of bearings and proper maintenance of your trailer can extend their lifespan.
Q: How do I know if my boat trailer bearings are bad?
A: Signs of worn boat trailer bearings include excessive play in the tires, loud noises while towing, overheating, and rust or corrosion.
Conclusion
Replacing bearings on a boat trailer is a crucial maintenance task that ensures the safety and longevity of your trailer. By following the step-by-step guide and tips outlined in this article, you can successfully replace bearings on your boat trailer. Remember, regular inspection and maintenance of your trailer is key to preventing bearing failure and keeping your boat
