How to Replace Bearings on a Boat Trailer: A Comprehensive Guide for Trailer Owners
Introduction
Bearings are crucial components of any boat trailer, enabling smooth and safe transportation of your valuable vessel. Worn-out or damaged bearings can lead to catastrophic failures, potentially endangering your boat and your safety. This comprehensive guide will take you through the step-by-step process of replacing bearings on a boat trailer, empowering you with the knowledge and expertise to ensure the reliability and longevity of your trailer.
Understanding the Importance of Bearings
Bearings are precision-engineered components that reduce friction between rotating surfaces, allowing for smooth operation and minimizing wear and tear. In a boat trailer, bearings play a critical role in supporting the weight of the boat and facilitating its movement.
-
Reduced Friction: Bearings minimize friction between the axle and the wheel hub, allowing the wheels to rotate freely with minimal resistance.
-
Extended Component Life: Proper bearing maintenance significantly extends the lifespan of other trailer components, such as the axle, hub, and tire.
-
Enhanced Safety: Well-maintained bearings reduce the risk of trailer failure, which can lead to dangerous situations on the road or at the launch ramp.
Statistics on Bearing Failures:

According to the National Highway Traffic Safety Administration (NHTSA), bearing failures account for approximately 20% of all trailer-related accidents. Of these accidents, 75% are attributed to inadequate bearing maintenance or replacement.
Tools and Materials Required
Before embarking on the bearing replacement process, ensure you have the necessary tools and materials:
-
Bearing Puller: A specialized tool designed to remove bearings from the hub without damaging the components.
-
Bearing Packer: A tool used to apply grease evenly to the bearings before installation.
-
Grease Gun: A tool for applying grease to the hub and bearings.
-
Seal Puller: A tool for removing seals from the hub.
-
Seal Driver: A tool for installing new seals on the hub.
-
Cotter Pins: Locking pins used to secure the bearings on the axle.
-
New Bearings and Seals: Select replacements that are compatible with your specific trailer make and model.
-
High-Temperature Grease: Marine-grade grease specifically formulated for boat trailer bearings.
-
Safety Gloves and Glasses: For protection during the process.
Step-by-Step Replacement Process
Step 1: Preparation

-
Safety First: Wear safety gloves and glasses to protect yourself from grease and metal burrs.
-
Gather Tools and Materials: Ensure you have all the necessary tools and materials gathered before starting.
-
Park the Trailer: Park the trailer on a level surface and engage the parking brake.
Step 2: Wheel Removal
-
Loosen Lug Nuts: Use a lug wrench to loosen the lug nuts on the wheel you will be working on, but do not remove them completely.
-
Lift the Trailer: Position a jack stand under the axle near the wheel you will be replacing. Slowly raise the jack stand until the wheel is lifted off the ground.
-
Remove Lug Nuts and Wheel: Completely remove the lug nuts and carefully lift the wheel away from the axle.
Step 3: Hub Removal
-
Remove Hub Cap: Pry off the hub cap using a flat-head screwdriver or a specialized hub cap removal tool.
-
Remove Hub Nut: Use a socket wrench to loosen and remove the hub nut.
-
Remove Washer and Hub: Pull the washer off the axle and slide the hub off the axle shaft.
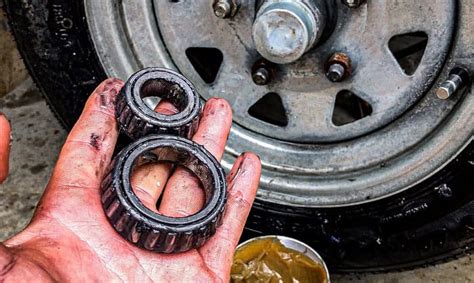
Step 4: Bearing Removal
-
Protect Axle: Place a rubber or wooden block between the axle and the bearing puller to prevent damage to the axle.
-
Attach Bearing Puller: Secure the bearing puller to the bearing.
-
Extract Bearing: Tighten the bearing puller to remove the bearing from the hub.
Step 5: Seal Removal
-
Protect Hub: Use a piece of cardboard or a shop rag to protect the hub during the seal removal process.
-
Attach Seal Puller: Hook the seal puller to the seal.
-
Extract Seal: Pull the seal puller to remove the seal from the hub.
Step 6: Clean and Inspect
-
Clean Components: Thoroughly clean the hub, axle, and bearing surfaces using brake cleaner or degreaser.
-
Inspect Components: Examine the hub, axle, and old bearings for any signs of damage or wear. Replace any damaged components.
Step 7: Reinstallation
-
Install Seal: Use a seal driver to carefully drive the new seal onto the hub.
-
Lubricate Bearing: Apply a generous amount of high-temperature grease to the inside of the new bearing using a bearing packer.
-
Install Bearing: Place the lubricated bearing onto the hub.
-
Install Washer and Hub: Slide the hub onto the axle and secure it with the washer.
-
Tighten Hub Nut: Thread the hub nut onto the axle and tighten it to the specified torque using a torque wrench.
Step 8: Reassembly
-
Attach Wheel: Carefully lift the wheel back onto the axle and secure it with the lug nuts.
-
Tighten Lug Nuts: Gradually tighten the lug nuts using a star pattern to ensure even distribution of the load.
-
Lower Trailer: Slowly lower the trailer using the jack stand.
-
Tighten Lug Nuts to Torque: Use a torque wrench to tighten the lug nuts to the specified torque.
Step 9: Grease Lubrication
-
Apply Grease to Hub Cap: Generously apply grease to the inside of the hub cap before installing it.
-
Install Hub Cap: Press the hub cap back onto the hub.
-
Grease Zerk Fitting: Use a grease gun to apply grease to the zerk fitting on the hub to lubricate the bearings.
Step 10: Post-Replacement Inspection
-
Thorough Visual Inspection: Check for any loose components, leaks, or unusual noises.
-
Test Bearings: Rotate the wheel by hand to ensure it spins freely without any resistance or grinding sounds.
-
Confirm Grease Flow: Pump grease into the zerk fitting until you see grease flowing out the hub cap.
Tips and Tricks
-
Use High-Quality Bearings: Invest in high-quality bearings specifically designed for boat trailers to ensure durability and performance.
-
Apply Ample Grease: Do not skimp on grease. Apply a generous amount to all bearing surfaces to reduce friction and extend component life.
-
Torque to Specifications: Follow the manufacturer's torque specifications for the hub nut and lug nuts to ensure proper tightening and prevent component damage.
-
Regular Maintenance: Grease bearings regularly to ensure optimal performance and prevent premature failure.
-
Consider a Bearing Buddy: Install a bearing buddy on each hub to automatically dispense grease while towing, reducing maintenance frequency.
Common Mistakes to Avoid
-
Overtightening: Avoid overtightening the hub nut or lug nuts, as this can damage the threads or bearings.
-
Using Incorrect Grease: Use only marine-grade grease specifically formulated for boat trailer bearings. Other types of grease may not provide adequate protection.
-
Neglecting Grease Maintenance: Failure to regularly grease bearings can lead to premature wear and failure.
-
Ignoring Damaged Components: Replace any damaged or worn components, including the hub, axle, or bearings, to prevent further issues.
-
Replacing Only One Bearing: Always replace both bearings on a single axle to ensure even distribution of
