The Ultimate Guide to Soldering: A Beginner's Step-by-Step Guide
Introduction
Soldering is a fundamental skill in electronics, allowing you to join electrical components and create functional circuits. However, it can be daunting for beginners. This comprehensive guide will provide you with all the knowledge, tips, and tricks you need to master the art of soldering.
Getting Started
Materials You'll Need
- Soldering iron (30-40 watts is suitable for most projects)
- Solder wire (60/40 rosin-core is commonly used)
- Flux (optional, but recommended for cleaning surfaces)
- Desoldering tool (for removing solder connections)
- Safety glasses
- Heat-resistant gloves
- Soldering stand
- Helping hands (for holding components in place)
Safety First!
- **Always wear safety glasses to protect your eyes from molten solder and sparks.
- **Use a heat-resistant surface or soldering mat to prevent burns and damage to your workspace.
- **Never point the soldering iron towards people or flammable materials.
- **Let the soldering iron cool down completely before storing it.
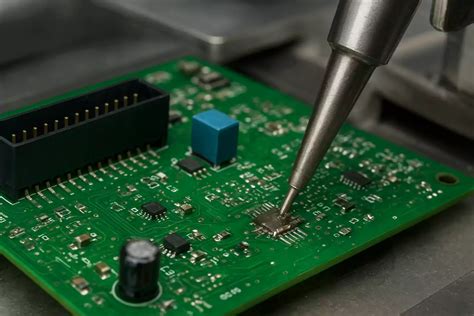
Step-by-Step Soldering Process
-
Prepare the components: Clean the surfaces to be soldered with a flux pen or flux-core solder wire. This helps remove any dirt or oxidation.
-
Tin the soldering iron: Heat the tip of the soldering iron and apply a small amount of solder to it. This will prevent the iron from sticking to the components.
-
Apply solder: Touch the soldering iron to the joint and feed the solder wire into the connection. The solder will flow into the joint, creating a secure bond.
-
Remove the iron: Once the solder has flowed, remove the soldering iron and allow the solder to cool and solidify.
-
Inspect the joint: Check the solder joint for any imperfections, such as voids or cold solder joints (insufficient heat or solder). If necessary, reheat the joint and add more solder.
Common Mistakes to Avoid
-
Using too much solder: Excess solder can create shorts and interfere with the circuit's operation.
-
Not using enough solder: Insufficient solder will result in a weak joint that can easily break.
-
Overheating the components: Excessive heat can damage delicate electronic components.
-
Touching the solder with your hands: Solder can burn your skin if it comes into contact with it.
-
Soldering on dirty surfaces: Dirt and oxidation on the components can prevent a good solder joint.
Advanced Techniques
Desoldering
At times, you may need to remove existing solder joints. This is where a desoldering tool comes in handy. It uses a heat-sucking device to extract the molten solder from the joint.
Surface Mount Technology (SMT) Soldering
SMT components are tiny and require special techniques for soldering. Use a fine-tipped soldering iron and precision tweezers to handle these delicate components.

Success Stories
The Amateur Radio Enthusiast
John, a hobbyist radio enthusiast, was determined to build his own shortwave receiver. After practicing his soldering skills, he successfully assembled the receiver, which brought him hours of joy and connection with distant stations.
The Maker Maven
Sarah, an avid maker, was creating an interactive light-up sculpture. Using her soldering skills, she meticulously connected numerous LEDs and sensors, bringing her creative vision to life.

The Robotics Whiz Kid
Alex, a 10-year-old robotics prodigy, built a fully functional robot from scratch. His newfound soldering skills allowed him to securely connect all the components, leading to a successful and impressive project.
Conclusion
Mastering soldering unlocks a world of possibilities in electronics and DIY projects. Whether you're building a circuit board, repairing an appliance, or creating an art installation, this skill will empower you to bring your projects to life. Remember, practice makes perfect. So, grab your soldering iron, invest some time in practice, and start exploring the endless possibilities of soldering!
Frequently Asked Questions (FAQs)
Q: What is the best way to learn soldering?
A: Practice is key. Get a soldering kit and practice on scrap components or practice boards.
Q: How can I prevent cold solder joints?
A: Use sufficient heat and solder, and allow the joint to cool completely before moving it.
Q: What is the recommended temperature for soldering irons?
A: For general electronics work, a temperature between 350-450 degrees Celsius is suitable.
Table 1: Soldering Iron Types
| Type |
Description |
Pros |
Cons |
| Pen-style |
Compact and easy to handle |
Excellent for small components |
Limited power for larger projects |
| Pencil-style |
More powerful than pen-style |
Suitable for a wide range of projects |
Requires a separate stand |
| Temperature-controlled |
Precise temperature adjustment |
Prevents overheating |
More expensive |
Table 2: Types of Solder**
| Type |
Composition |
Melting Point |
Applications |
| 60/40 Rosin-core |
60% tin, 40% lead |
183 degrees Celsius |
General electronics |
| Lead-free |
No lead |
Higher melting point |
Environmental-friendly |
| Silver-bearing |
Contains silver |
Lower melting point |
High-reliability applications |
Table 3: Troubleshooting Soldering Problems**
| Problem |
Cause |
Solution |
| Solder doesn't flow properly |
Dirty surfaces, insufficient heat |
Clean surfaces, increase heat |
| Cold solder joint |
Insufficient heat, rapid cooling |
Apply more heat, allow joint to cool slowly |
| Solder bridge |
Excess solder |
Use desoldering tool, apply solder wick to remove excess |
| Broken solder joint |
Mechanical stress, oxidation |
Reheat joint, apply flux |
